I happened upon a book called Food and Cooking in Victorian England by Andrea Broomfield. One of the first things I learned from this book was how the Industrial Revolution shaped Victorian England. Before the Industrial Revolution, most people worked from their homes to make goods to sell. They had their own gardens and raised animals to provide food for their families. When factories started supplying these same goods, the people had no choice but to move to cities and work in the factories. The populations of these cities boomed. Because homes were small and time and space was limited, this meant that people could no longer have gardens and keep animals for food. The food they ate had to be bought from others, instead of making it themselves. It only took a couple generations before people no longer knew how to do things like make cheese and butter.
That got me thinking. What kinds of skills am I lacking that to my grandparents and great-grandparents were parts of daily life? One thing that I knew for sure I had to learn was how to make and preserve my Nana’s Apple Butter. I’ve been eating this stuff all my life, and I’ve never met a better apple butter.
First Comes the Applesauce
We started with just over a half-bushel of apples. Some were Jonathan apples and the others we think are Granny Smith. Nana went to the Farmer’s Market and asked what would be a good cooking apple for apple butter. You want something that will make a tart applesauce.
Wash the apples, core and slice them with the peel on. Place the slices in a large metal bowl with about a cup of water. Heat on medium-high, stirring often so the apples don’t stick. Cook the apples until completely soft, time depends on quantity.
To make the applesauce, we used a China cap and wooden pestle, but a food mill or potato ricer may work too. The goal is to push the apples through the small holes of the strainer, and discard the peel. This step is the most time consuming part of the whole process.
Now you have applesauce!! Measure the applesauce so you know how to adjust the recipe.
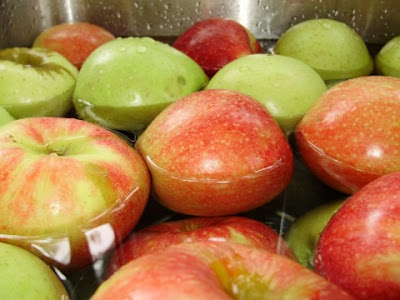
Giving the apples a bath
 Nana stirring the apples so they don't stick.
  Cook them until they turn into a mushy apple slop.
 Nana's China Hat and Wooden Pestle
Let me show you how this works...
 Nana is doing her applesauce workout, it really works the arms!!
 Our lovely applesauce. We had 7 quarts!
Apple Butter
2 quarts applesauce (you could use store-bought applesauce, see note below)
4 cups sugar
2 teaspoons ground cinnamon
¼ teaspoon ground cloves
¼ teaspoon allspice
Add sugar and spices to applesauce and mix well.
*(If using store-bought applesauce, taste as you mix in sugar so you don’t add too much, if it is too sweet, you can add 1 tbsp of lemon juice.)
Cook on medium-low heat until the flavors are well blended.To prevent sticking, stir frequently as mixture thickens. (If too thick, add a small amount of water for desired consistency.)
 Sugar? Check! Spices? Check! Yummy? Check!
 While heating the apple butter, you can sterilize your jars, rings and caps. In a large pot, place your jars upside down. Add water until it comes about an inch up the jars. Add the rings and caps to the pot. Let sterilize for about 10 minutes. Keep them hot until ready to use. To retrieve them from the boiling water, you can use a canning jar lifter, (or a hand towel if you are brave like us) and kitchen tongs.
 Most people seem to be intimidated by this part, but it's not so bad.
I love watching the water rise into the jars while sterilizing.
Pour the hot apple butter into hot jars, leaving ¼ inch headspace, (space between the apple butter and lip of the jar.) Use a canning funnel to keep things clean, and if any apple butter gets on the rim of the jar, wipe it clean or it will not seal properly. Place the cap on the jar, screw down tightly and set aside. The caps will pop after a few minutes which proves it has sealed correctly.
Now you have lovely and delicious apple butter!
Click here for the Printable Recipes for Homemade Applesauce and Apple Butter at Tasty Kitchen.
 We're using my great-grandmother's canning funnel.
 Nana gave it to me when we were done!
 We used a hand towel to help protect our hands from the hot jars and lids.
  Don't these look great? Wouldn't you like to have one?
  How about this little guy?
Post a comment telling your favorite thing about fall, and you'll be placed in a drawing for this little jar of apple butter. Make sure to leave your email or website in the comment so I know how to contact you. I will only be able to ship this inside the U.S., (sorry friends elsewhere). I'll do the drawing on October 1st using a random number generator. Congratulations Jenny! Your number was drawn with the Random Number Generator at RANDOM.ORG.
True Random Number Generator Min: 1 Max: 9 Result: 5 Powered by RANDOM.ORG